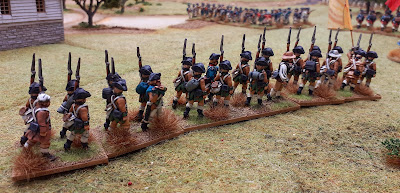
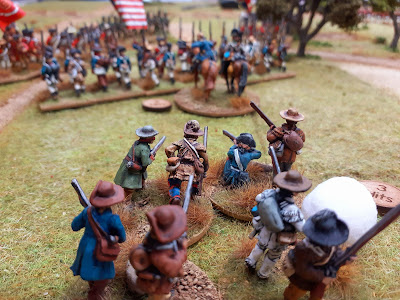
Regular wargaming partner Chris Charlton came over recently for another game of AWI. Our group has played this quite a few times over the last 12 months and the home brew rules seem to be coming along nicely, although still firmly in the playtesting stage.
The scenario revolved around a meeting engagement in which a British force of 3 brigades (commanded by me) was attempting to pounce on what it thought was an isolated American force, only to see fresh troops arriving on the battlefield to reinforce it.
The British had a brigade of good quality regulars (2 battalions), supported by a solid brigade of Hessians (3 battalions, including one of grenadiers, a jager company and a section of Hessian artillery) and an advance guard made up of British Legion infantry, a loyalist battalion with a company of poor quality loyalist skirmishers and a high quality company of British light infantry. The American force was made up of two regular brigades and a small brigade of rifle armed skirmishers under Morgan himself. The forces were of a similar size, with the British enjoying a slight edge in quality, albeit they were doing most of the attacking.
Here we see an overview of the battlefield with the advance guard moving over the ford, with the British regulars close behind. The Hessians who were mainly deployed for action are on the far side.
And here they are again deploying (slowly) for action. By this time a brigade of Continentals has arrived to support the rifles and things are hotting up for the British.

Risking a bayonet charge, things go their way. Shrugging off the closing fire they rout the rebels after a short, sharp encounter, encouraged by their brigadier. They would go on to do the same to a supporting enemy regiment in the following turn, albeit at some cost. The Legion, who had offered some supporting fire are now hanging back, feeling they have done their bit.
In the end, the British were able to drive back the units facing them, although at heavy cost and it was doubtful that they would be able to do much more. On the British left, the Hessians were struggling to hold on, those damned light infantry fighting particularly well. Unfortunately our correspondent didn't cover this side of the action in any great detail, although it was largely a (losing) firefight.
In the end a great game with each side holding the advantage on their right flank, but struggling badly on the left. As packing up time arrived, we felt that a hard-fought draw was an appropriate verdict.
The rules work on a multiple activation system whereby each unit (or brigade if they are all doing the same thing) has a number of attempts (between 3 and 5) to move, manoeuvre, load and fire etc each turn. The more complicated the action, the harder it is to succeed; so for example moving straight ahead with no deviation is accomplished on a throw of 2+, to wheel requires a 3+, to move to a flank or reform needs a 4+ and so on. Things are slightly harder in difficult terrain such as woods. You declare what each unit or group will do in that turn, but if the first option fails, you have to carry on until you are successful, so often you don't achieve everything you might want, so forward planning and risk assessment are a big part of the game. Getting too close to the enemy in the wrong formation can be a problem - changing formation needs a 4+. One of my British regulars (my best unit) got on the flank of the American light infantry regiment with its first action whilst still in march column, subsequently failing 3 times to form into line and charge, which I had every expectation of doing. Instead they milled around under close range canister and rifle fire - not good!!
The rules still need a bit more playtesting, but we have found that they give an enjoyable and often nail biting game as you can never be certain how much, or little your units will achieve.
Anyway this is the first in what I hope will be a more regular offering of AARs - something I always enjoy reading on other people's blogs. Hope you found it of interest.


Steve,
ReplyDeleteAlways good to see AWI games. Interesting scenario and a good read. Lovely miniatures.
Hope to see more 18th century posts during the year.
Regards
John
Thanks John. I know the AWI is one of your favourites! I certainly hope to be doing a lot more of both AWI and 7YW as that collection progresses.
DeleteA grand read and a super looking game, very nice indeed.
ReplyDeleteThanks very much. Will need to work on my "War Correspondent" skills a little, but hopefully it gave a good flavour of the game.
DeleteA very interesting battle report Steve. It certainly looked and sounded like a fab game.
ReplyDeleteThanks Ray, it was a good game.
DeleteAWI is a firm fave of mine and your rules do the conflict justice. The mix of unit types and varying quality are well dealt with. Morale tests are definitely nervous moments! This game, as usual, was great fun thanks! Cheers, Chris
ReplyDeleteCheers Chris!!
DeleteLovely looking game! AWI has that atmosphere all it's own that always attracts my attention.
ReplyDeleteAgree one of my real favourites. Looks nice and gives an interesting game.
Delete